
Autumn crafts for kids
The days of dashing through sprinklers, playing at the park, and in general, spending the majority of your time outdoors are quickly coming to an end. For many of us, fall weather has already descended. In the midwest, temperatures are already low enough to warrant light jackets. For moms everywhere this means finding fun and educational indoor activities – FAST! For many, it means breaking out some hands on crafts that allow the little ones to exercise creativity, motor skills, and excess energy while learning a thing or two.
Depending on which part of the country you live in, the fall provides a unique opportunity to engage in some fun and frugal crafts by using items found in nature such as leaves and pine cones. Here are some crafts that are easy, fun, and kid friendly!
Bird Feeders
Pinecones
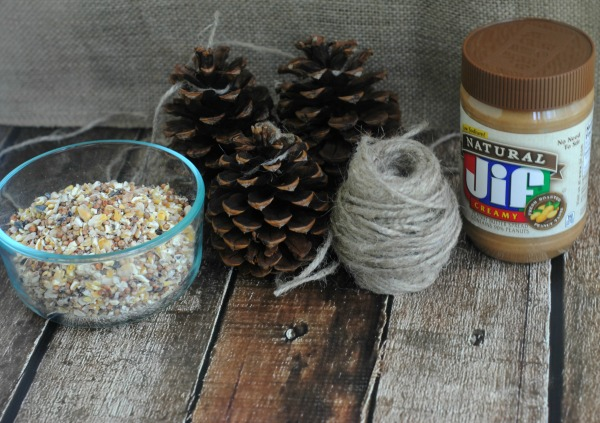
MATERIALS
- Pine cones – Look for those that are open to make spreading the peanut butter a lot easier.
- Peanut butter – Don’t be afraid to buy off-brand or cheap peanut butter…the birds won’t mind!
- Twine
- Bird seed
DIRECTIONS
1. Cut a length of twine for each pine cone. The twine should be long enough to tie around the top of a pine cone and then hang from a tree branch (12-20″)
2. Tie the twine around the very top part of the pine cone. NOTE: Do this first because doing it last (after the pine cones are covered in peanut butter) would be super messy.
3. Using a small spatula or butter knife, spread peanut butter over the pine cone. NOTE: A little goes a long way so you don’t need a lot and the less you give the kids the less mess they make! 4. Pour some birdseed into a bowl wide enough for the pine cone. Roll the pine cone in the birdseed. You can also sprinkle birdseed directly onto the pine cone to make sure it is well covered.
Pumpkins and Squash
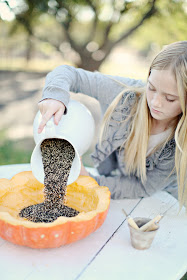
You can also make a pretty unique bird feeder out of pumpkins or any squash! Not only are these unique but they are a lovely seasonal touch to a tree right outside a window.
- Cut a 3- to 5-pound pumpkin in half; scoop out, leaving a 1/2-inch thick wall.
- Cut a 1/2-inch-deep groove in the rim for pumpkin seeds.
- For perches, poke holes and insert twigs.
- To hang, knot two lengths of twine together in center; tack knot to feeder bottom.
- Fill with bird seed.
Leaf Wreath
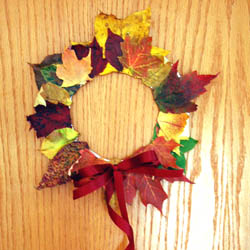
Create a leaf wreath this season… so easy to do! This is a wonderful craft project for any age. It is quick to put together and brings some of the outside in. This is an easy craft, so it works well as a daycare or preschool craft. Take a walk with the children and have them enjoy the color of the leaves and collect those that have fallen on the ground. Try to pick up the ones that are still fresh, and avoid the dry ones.
This craft isn’t just for children. Any age will enjoy a walk outdoors, collecting leaves this time of year. Senior centers can use this a craft for their residents. Each senior can decorate their own nature wreath to hang on their door.
Things Needed:
- Fresh Fall leaves in various colors
- Paper plate
- White school glue
- Scissors
- Pretty ribbon
- Begin this Autumn craft by collecting about twenty colorful leaves from outside. Try to get nice fresh ones that have just fallen… they will be easier to glue on.
- Cut the middle out from a paper plate. Fold the plate in half to get the cut started in the middle, then cut along the rim to make about a 2 inch paper plate border (young kids may need help with this part).
- Continue building the wreath by gluing each leaf to the paper plate. Slightly overlap each leaf. For this leaf craft, I had each leaf point in the same direction, with the stems pointing inward.
- Next, clip off the stems from each leaf using scissors.
- Tie a pretty Fall ribbon in a bow, then glue the bow on to the wreath.
A handy tip to extend the life of your leaf wreath is to dip the leaves in wax to “preserve” their freshness. Heat some white or cream colored wax over a wax warmer and dip the leaves to coat them thoroughly. Hold the leaf vertically to allow it to drip excess wax as it dries. The wax will dry in about 30 seconds, there you go! Dip the leaves before you begin gluing them to the paper plate and you will have a wreath that will remain “soft” and fresh looking for weeks. You can also use clear acrylic spray which can be found in hardware or craft stores along with the spray paint. Clear acrylic spray can give the leaves a nice glossy finish.
Easy, safe homemade paint
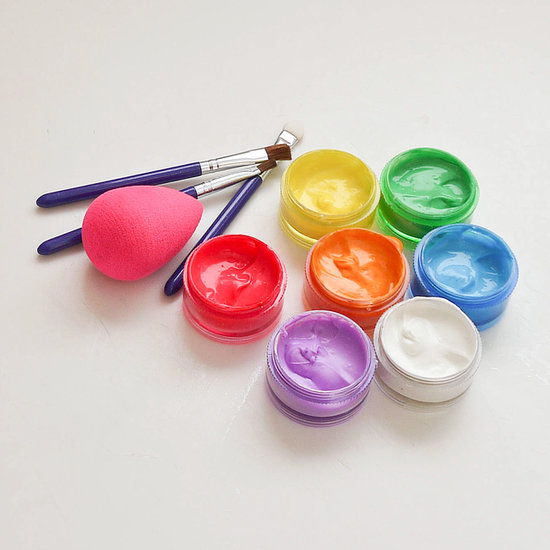
Sometimes the best Halloween costume is as simple as great face paint. Instead of picking up expensive kits made with questionable ingredients that may be harsh on skin (and leave lingering marks the next day), try making your own. It’s easier than you think and only costs a few dollars to pull off.
What You’ll Need:
- Corn starch
- Face lotion
- 1/4 teaspoon vegetable oil
- Washable paints, natural food coloring, or homemade dyes
- Small containers
- Small bowl
- Start by making a base for the face paints by mixing together equal parts cornstarch and your favorite face lotion until it forms a thick mixture. Add the vegetable oil, which keeps the paint from caking. You want things to be smooth without being too watery.
- Now add a spoonful of the mixture to a small container and add a pea-sized amount of washable paint. You can find packs of colorful washable paints at your local craft store or Walmart for only a few dollars. Using washable paint instead of natural food coloring creates solid colors that won’t stain clothes — or your face. Most are nontoxic, when diluted, and are safe to use on skin. Just remember to avoid using around the eye and mouth areas. You can also swap for a few drops of natural food coloring or homemade dyes.
- Continue adding colors until you’ve got an entire set of face paint. For a bit of shimmer, sprinkle glitter eye shadow into containers or swipe over finished face paint for allover glitter.
- Apply using face sponges or lip brushes for creating details. Paint will dry creating a smudge-free look. For a smoother application, add a few drops of water to the paints. As with any new makeup, rub a bit of the face paint on skin to check for reaction before applying.
Don’t feel like picking up a set of washable paints? Substitute with a few drops of natural food coloring, which also creates vibrant face paints. Just be warned that using food coloring may stain skin and clothing.
Scented playdough

We know kids love play dough, and this recipe for scented play dough might just be the best thing around. The directions are so easy, you’ll forget all about that stuff from the store.
Encourage your little one’s budding fine motor skills and entice their noses with scented play dough that is wonderfully soft and perfectly squishy. Along with offering a great scent, using small powdered drink mixes such as Kool-aid, gives this dough seriously vibrant color. And this recipe makes just the right amount for lots and lots of scented play-dough fun. Tis the season, try adding some cinnamon or pumpkin spice with some red food coloring, or mix a few to make some lovely fall colors!
What You’ll Need:
- 1 cup flour
- 1 cup water
- 2 tablespoons vegetable oil
- 1/2 cup salt
- 1 teaspoon cream of tartar
- 2 0.13-ounce packets powdered drink mix or a few hearty dashes of cinnamon, pumpkin spice or, nutmeg.
Directions:
- Measure out then add the ingredients to a saucepan and stir together over medium-high heat. Continue stirring for another two to three minutes while the dough comes together.
- Once the dough pulls together into one big ball, turn off the heat and allow the scented play dough to cool in the pan for five minutes.
- Turn the dough out onto a flour-dusted work surface and knead for one minute or until completely cool. Add additional flour as needed.
- Offer the scented play dough to your tot and get squishing! When it’s not in use, keep the play dough in a plastic bag or container. This dough will stay soft and playable for months if properly stored.
As the weather gets colder and we approach the end of daylights savings, try out some of these crafts with your kids and enjoy the way they adorn your home for the col months to come!

